
III. Installing the fuel mode
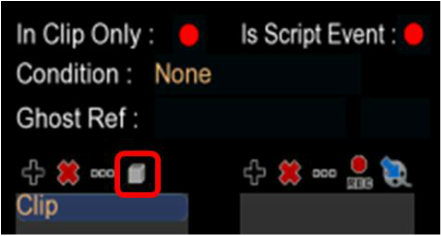
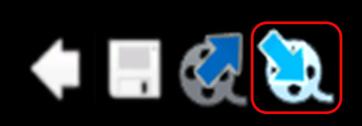
In order to install the fuel, you must click the second button of the mediatracker:
In order to install the fuel, you must click the second button of the mediatracker:
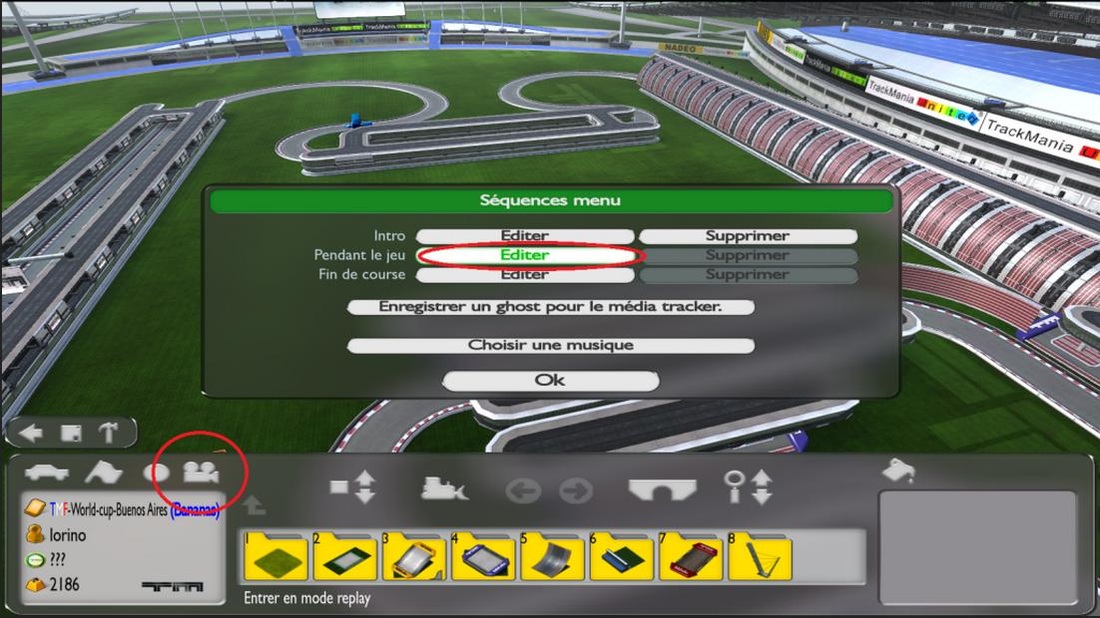

TM² Screen (English language setting) - Select the Media Tracker icon in the right bottom corner of the screen.
|
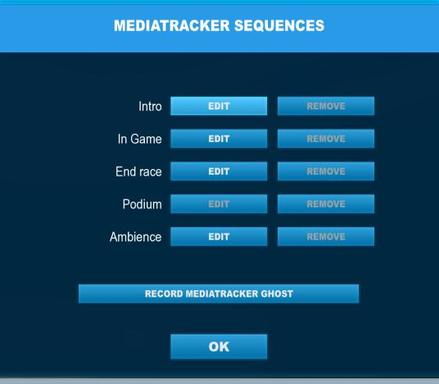
TM² Screen (English language setting) - Select EDIT next to InGame
|
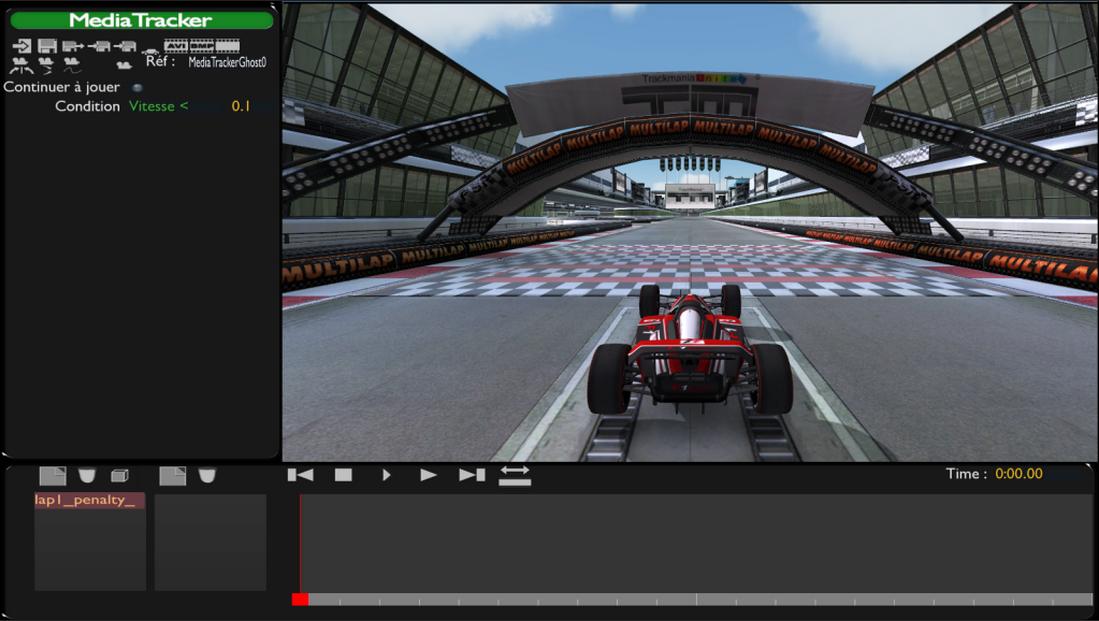
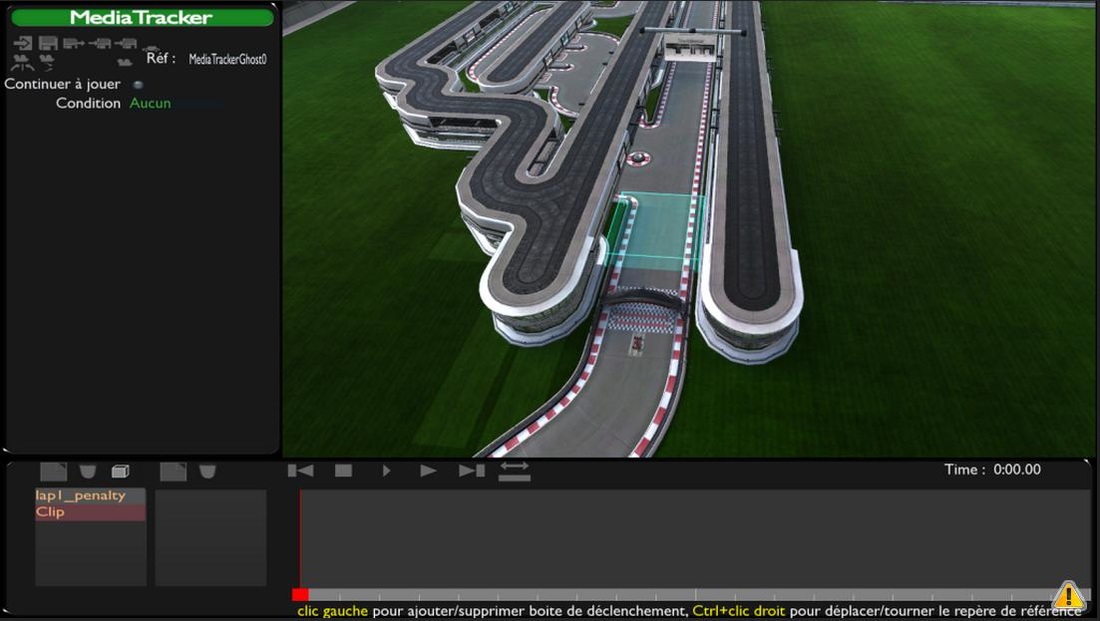
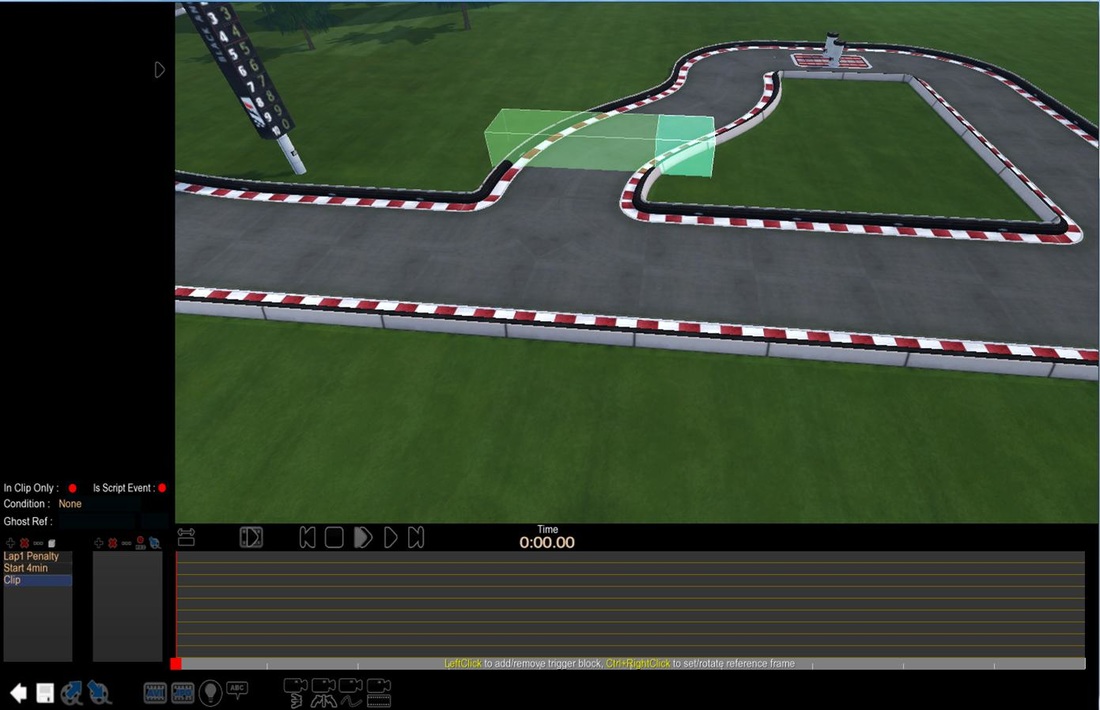
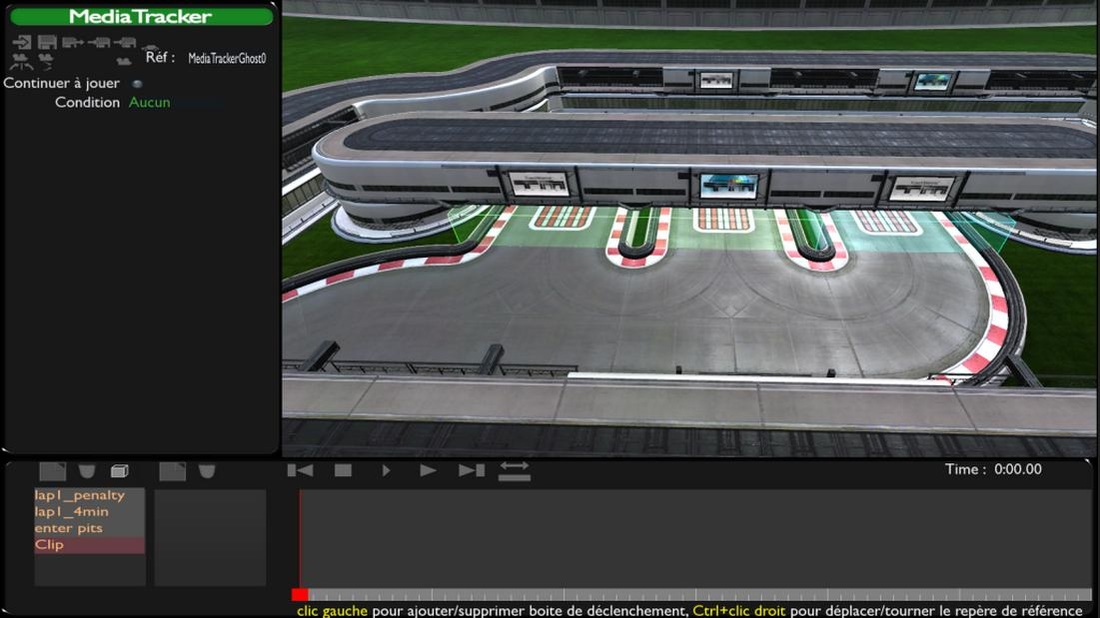
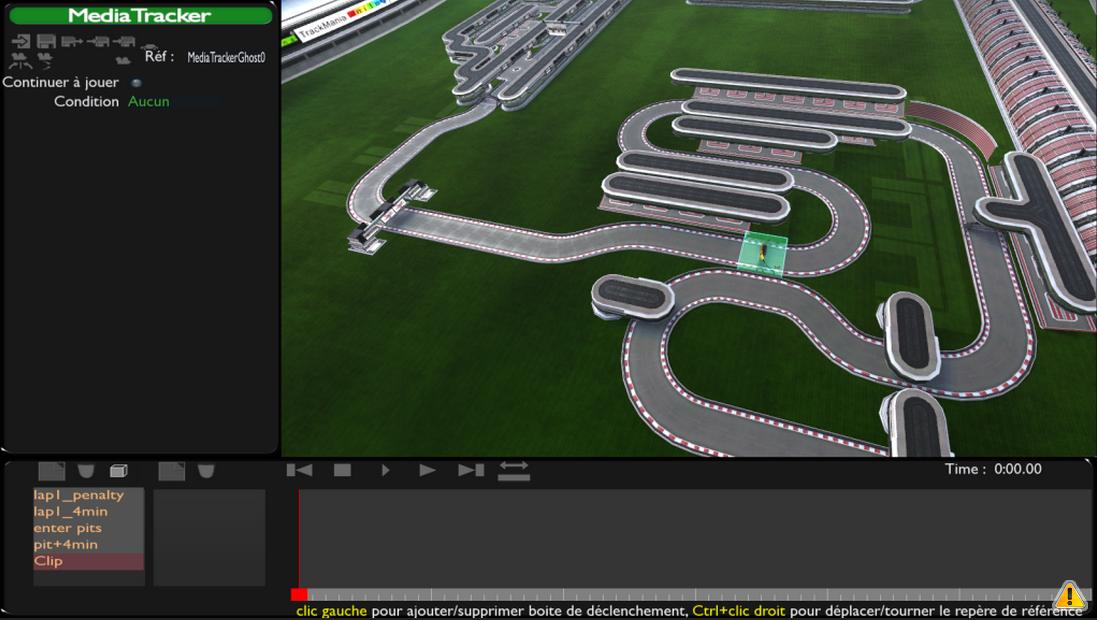
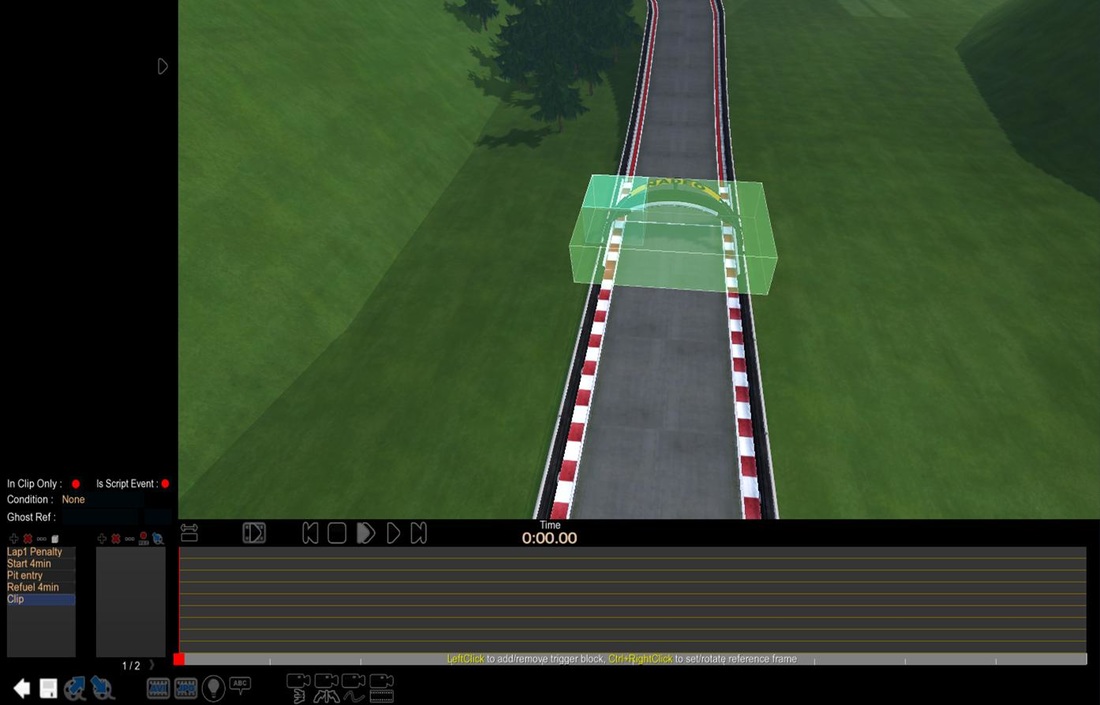
Then you can create a new clip in order to have a penalty when you restart at the first checkpoint (the start checkpoint). We want this penalty executed only if you are on the block where the start checkpoint is and if your speed is zero. For that, you first have to place the trigger block of your clip:
Tips on the MT controls can be found on the bottom of this page.
Tips on the MT controls can be found on the bottom of this page.
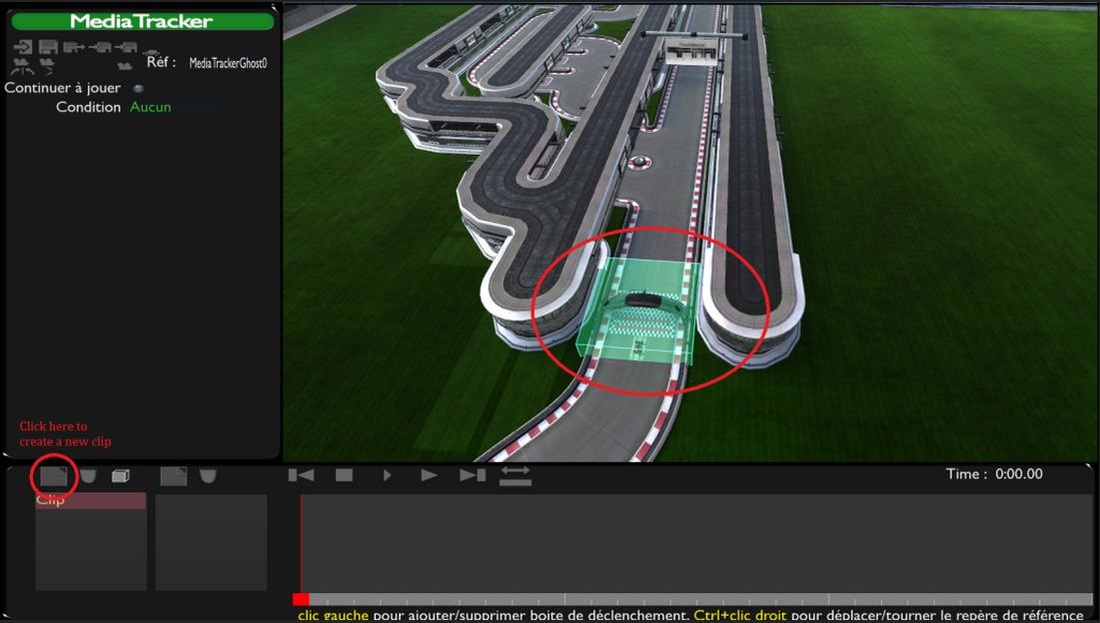
TM² Screen (English language setting) - Select the start area in the clip editor
TM² Screen (English language setting) - Click on the clip editor button to exit the clip editor
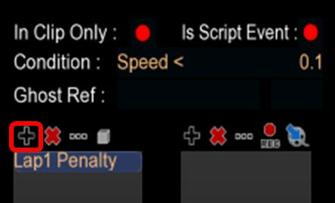
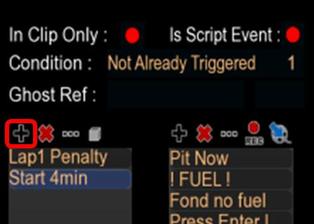
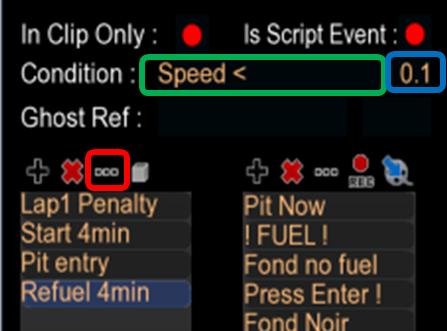
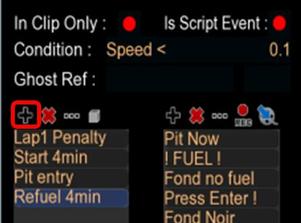
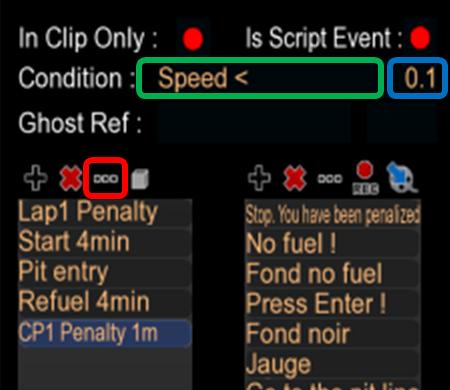
Now, you can set the conditions for the trigger (here, penalty happens when speed<0.1) and set the name of the clip (here "lap1_penalty")
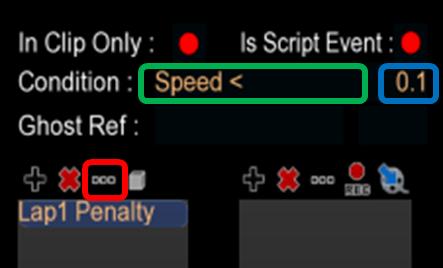
TM² Screen (English language setting) - Click on the Rename Clip button (red) to change the name into Lap1_Penalty. Click on the condition (green) to select the condition Speed <. Click on the condition value (blue) to set the speed to 0.1
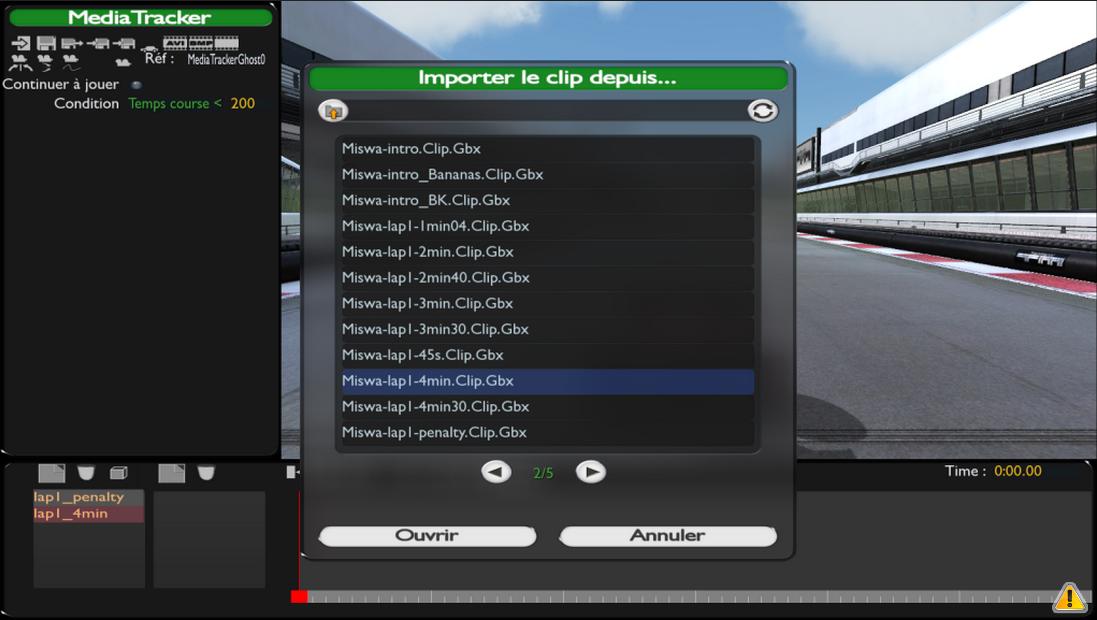
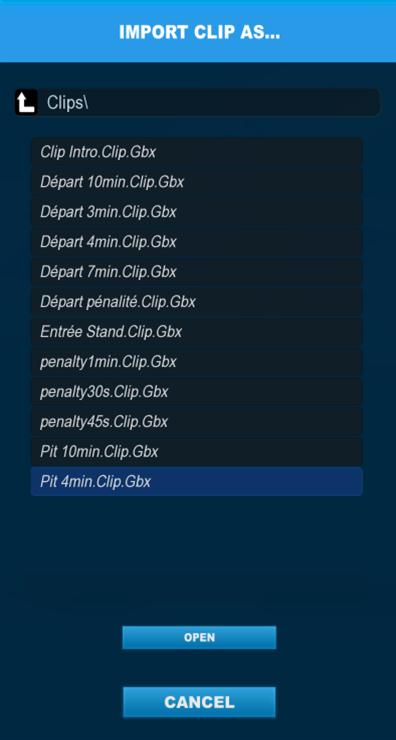
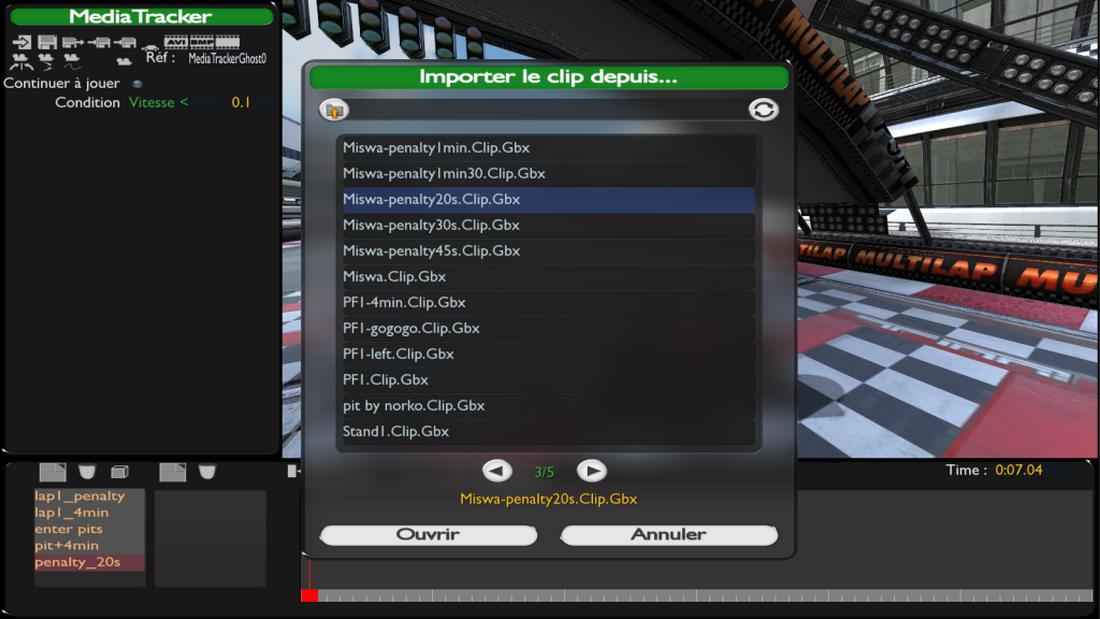
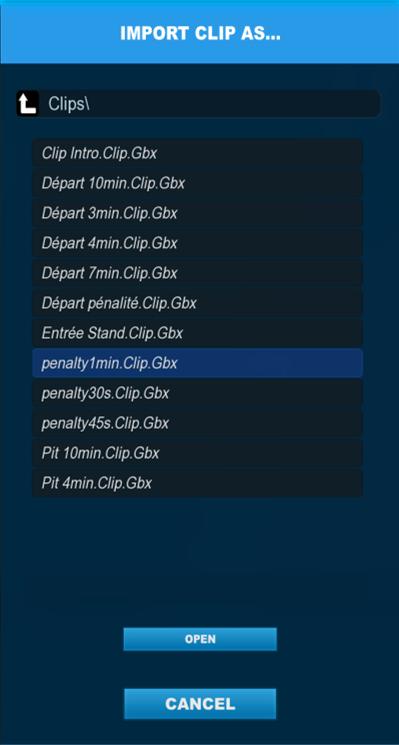
Then, you can import the clip from the clip-pack (the time must be approximately the time needed to go from the start checkpoint to the pit entrance)
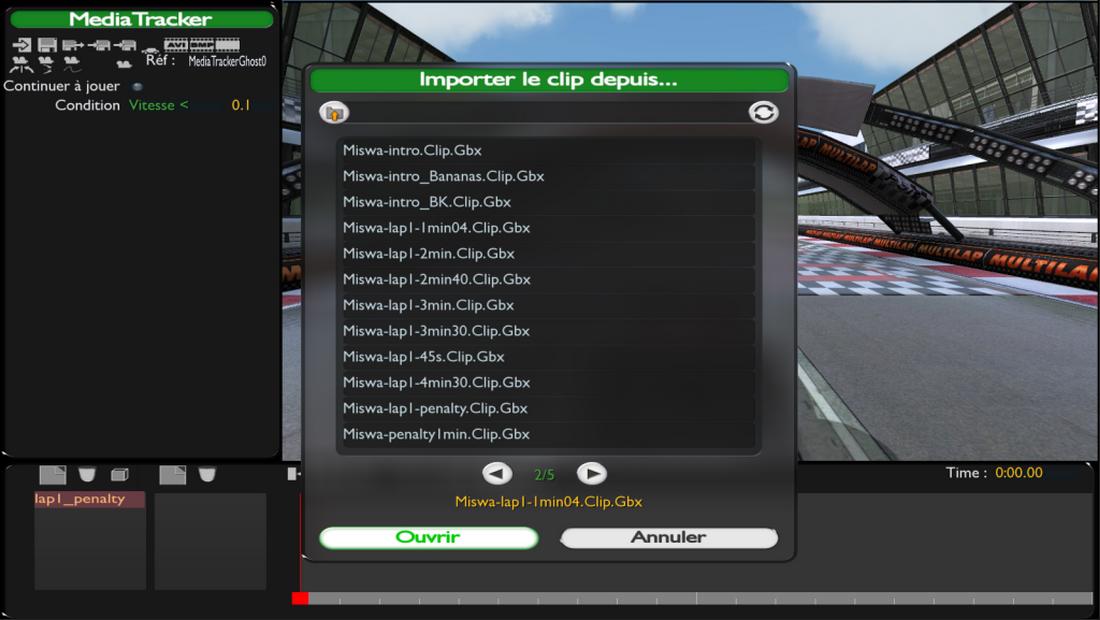

TM² Screen (English language setting) - Select the clip import button in the left bottom side of the screen
|
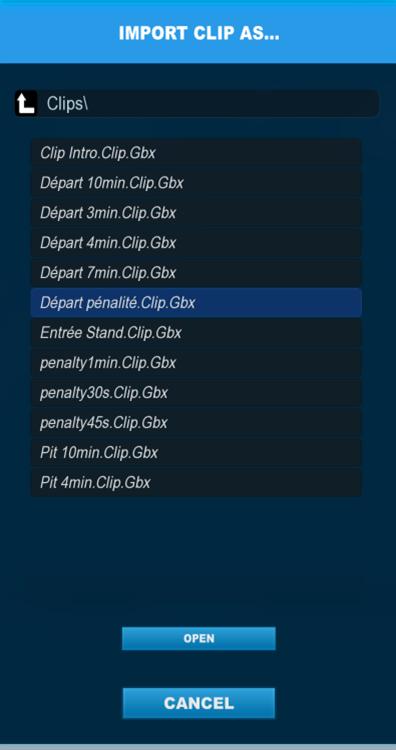
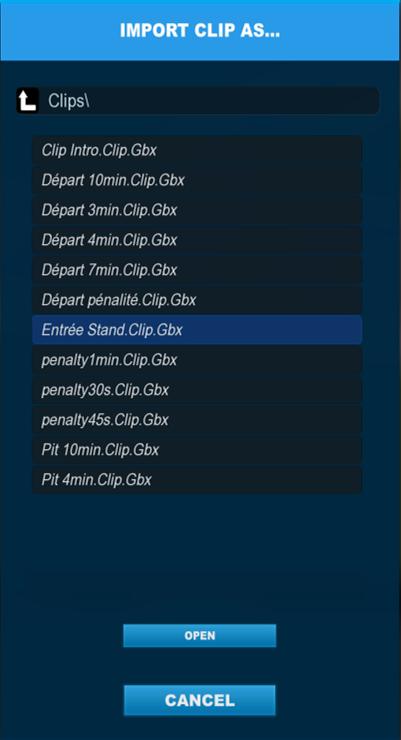
TM² Screen (English language setting) - Select the Start penalty in the import selection screen and click on OPEN
|
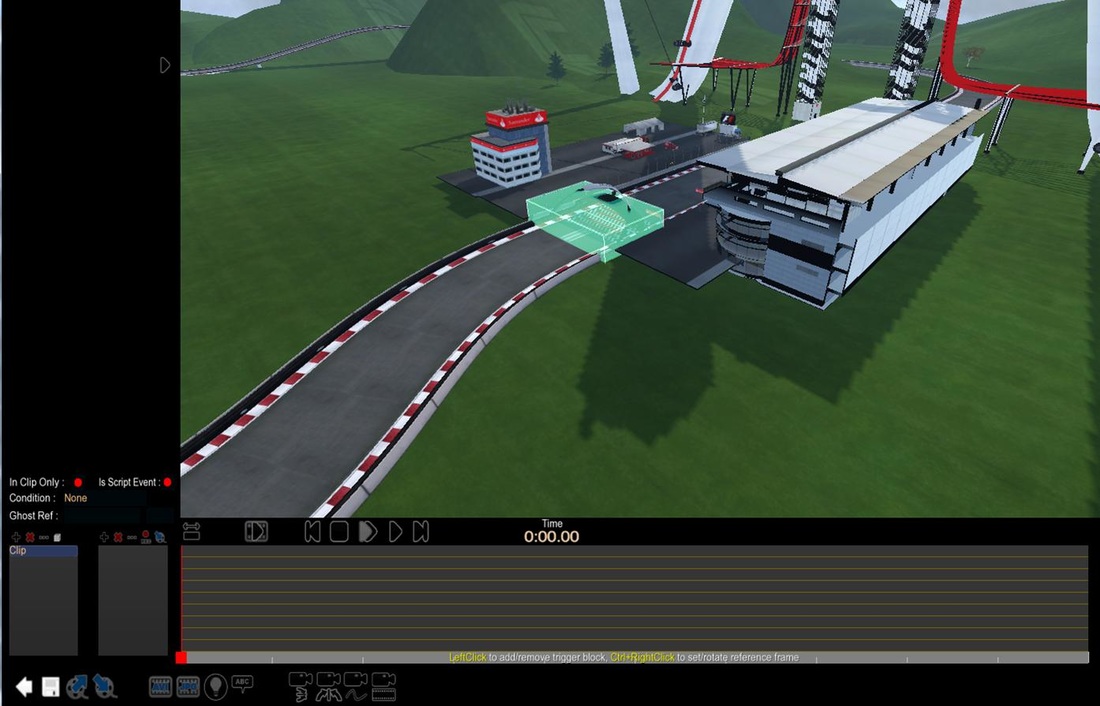
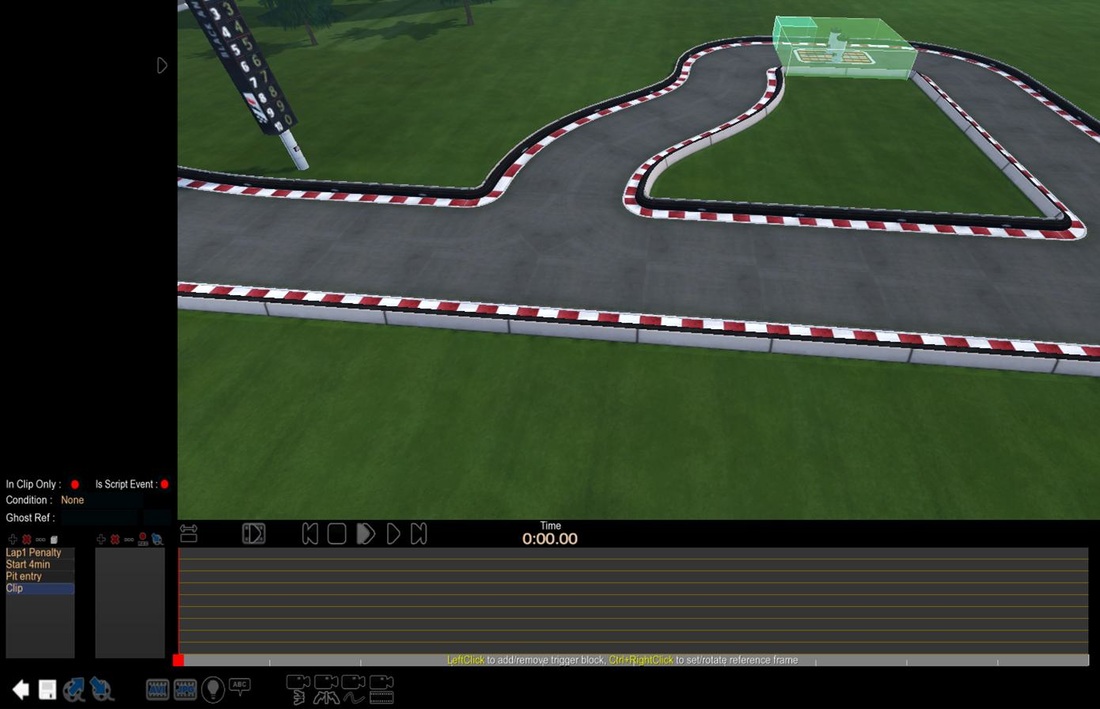
Second step is the creation of the clip correponding to 3-4 lap of fuel at the beginning of the race. In order to do that, you have to create a new clip. The trigger block is placed just after the start checkpoint in order to cancel the effect of the penalty situated at the start checkpoint, [this part works only with tmnf/tmuf, see tm² specificity post for tm² tracks] but with a time condition (only at the beginning of the race). The value of this time condition must be set to less than 1 lap (in order to be sure that no one can use the clip at the beginning of lap 2). For the tracks of the server, Warm up must also be taken into account (so, the time is longer, and also depends on a gap time depending of the server caracteristics). I generally set the time limit at 200s for a track where a lap can be done in 1min (hence 160s if the track lap is 40s long ...).
TM² Screen (English language setting) - Click on the Add Clip button (red)
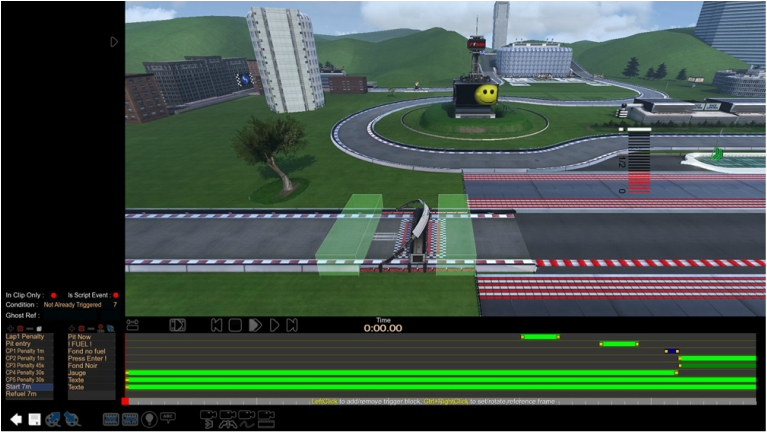
TM² Screen (English language setting) - Select the clip area (just before AND after start) in the clip editor. This will avoid any advantage a player would have starting the race in the other direction (doing 1 lap before the start/fuel is activated!)
AVOID OVERLAPPING OF THIS AND THE LAP1 PENALTY CLIP AREA!
Here I choose to set the fuel duration at 4min in order to allow refueling at 3rd or 4th lap

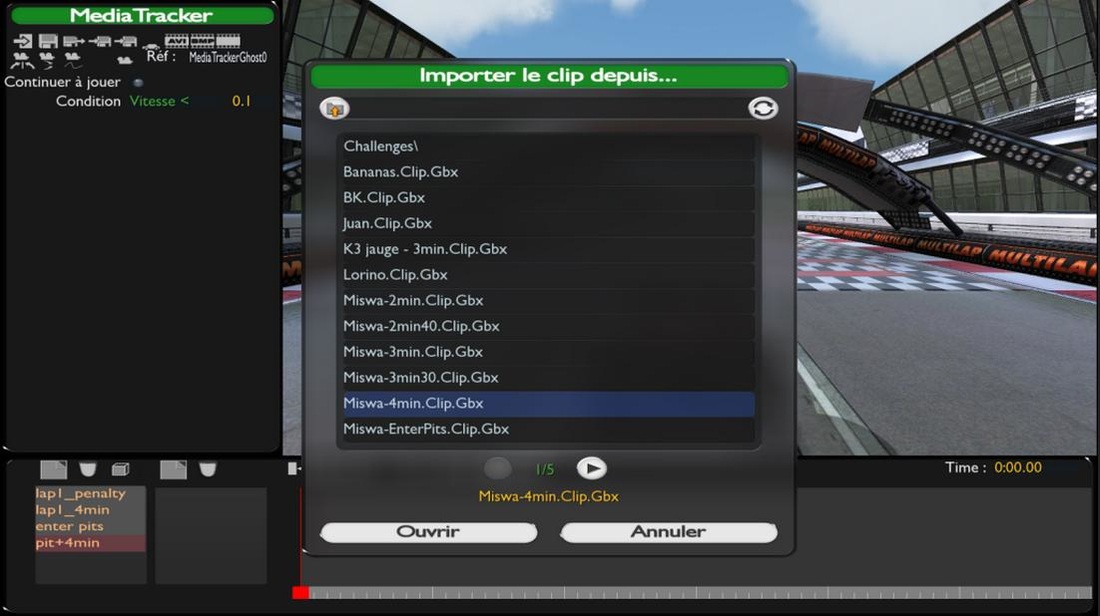
TM² Screen (English language setting) - Select the clip import button in the left bottom side of the screen
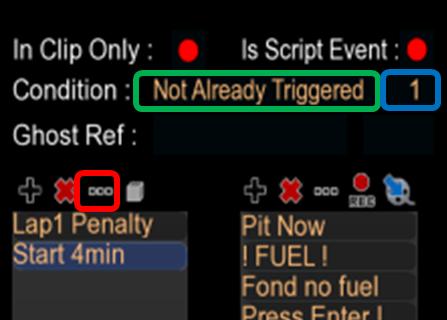
TM² Screen (English language setting) - After the Clip Import, click on the Rename Clip button (red) to change the name into Start 4min. Click on the condition (green) to select the condition Not Already Triggered. Click on the condition value (blue) to set the sequence to 1 (the count of clips in the editor starts at 0 so this clip is n° 1)
|
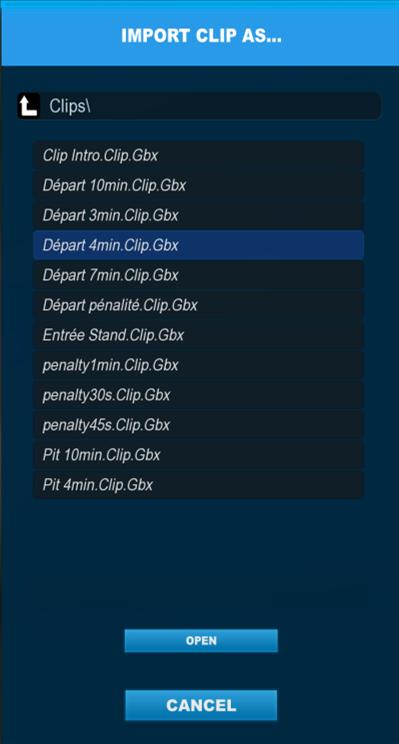
TM² Screen (English language setting) - Select the Start 4 min Clip in the import selection screen and click on OPEN
|
|
The third step is to create the clip at the entrance of the pits. It needs no conditions
|
TM² Screen (English language setting) - Click on the Add Clip button (red)
TM² Screen (English language setting) - Select the clip area in the clip editor
TM² Screen (English language setting) - Select the clip import button in the left bottom side of the screen
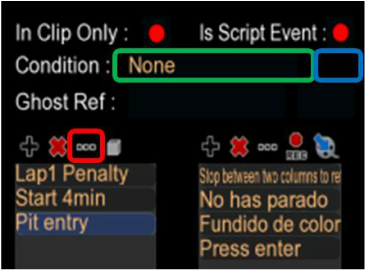
TM² Screen (English language setting) - After the Clip Import, click on the Rename Clip button (red) to change the name into Pit entry. Leave the condition (green) to None. The condition value (blue) does not need to be set
|
TM² Screen (English language setting) - Select the Enter Pit Clip in the import selection screen and click on OPEN
|
The 4th step consists in creating the clip for the pit work and the fuel fuel during 3-4 laps after the pits. You have to place one trigger bloc at each blocks with 2 columns of the pits. As in the first step, condition is speed < 0.1 (but it can be changed if you want to have fast pits where you don'yt have to stop to refuel ...)
Note: please try to clip at least 9 clip area blocks to refuel! This corresponds to 1 normal nadeo block). Don't make it too hard to pit.
Note: please try to clip at least 9 clip area blocks to refuel! This corresponds to 1 normal nadeo block). Don't make it too hard to pit.
TM² Screen (English language setting) - Select the clip area in the clip editor

TM² Screen (English language setting) - Select the clip import button in the left bottom side of the screen
TM² Screen (English language setting) - Click on the Rename Clip button (red) to change the name Refuel 4min. Click on the condition (green) to select the condition Speed <. Click on the condition value (blue) to set the speed to 0.1
|
TM² Screen (English language setting) - Select the Pit 4min Clip in the import selection screen and click on OPEN
|
The 5th step consists in creating the penalty at the various checkpoints. It is quite the same as first step at the start cp, but for the others cp. The time of fuel given after the penalty depends on the time you need to go from the cp to the entrance of the pits. I show here the example with the last penalty of the track:
|
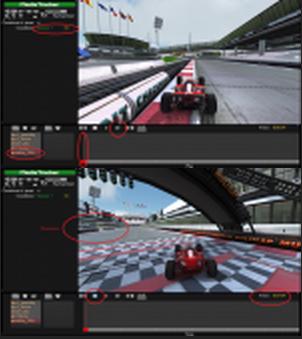
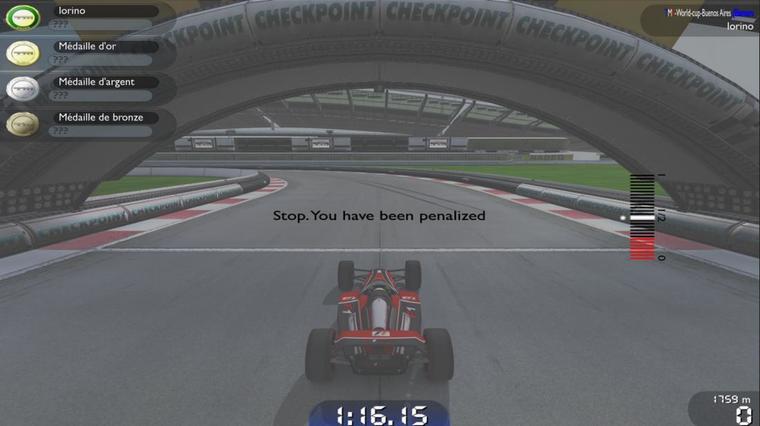
if you are not sure of the time to assign to the penalty fuel, you can, after block trigger placement, click on start to see your car replay starting from the cp. Then you just have to stop it when you arrive at the pit entrance and look at the time needed by the car to do that.
|
Here, I set the fuel time to 20s for the last cp. Do not forget to give a name to your clip, it will help you to remember what is the role of each clip if you want to edit your track to change something!)
You must do that for each cp (some cp can have the same clip if the time from the cp the pits entrance are approximately the same)
TM² Screen (English language setting) - Click on the Add Clip button (red)
TM² Screen (English language setting) - Select the clip area in the clip editor

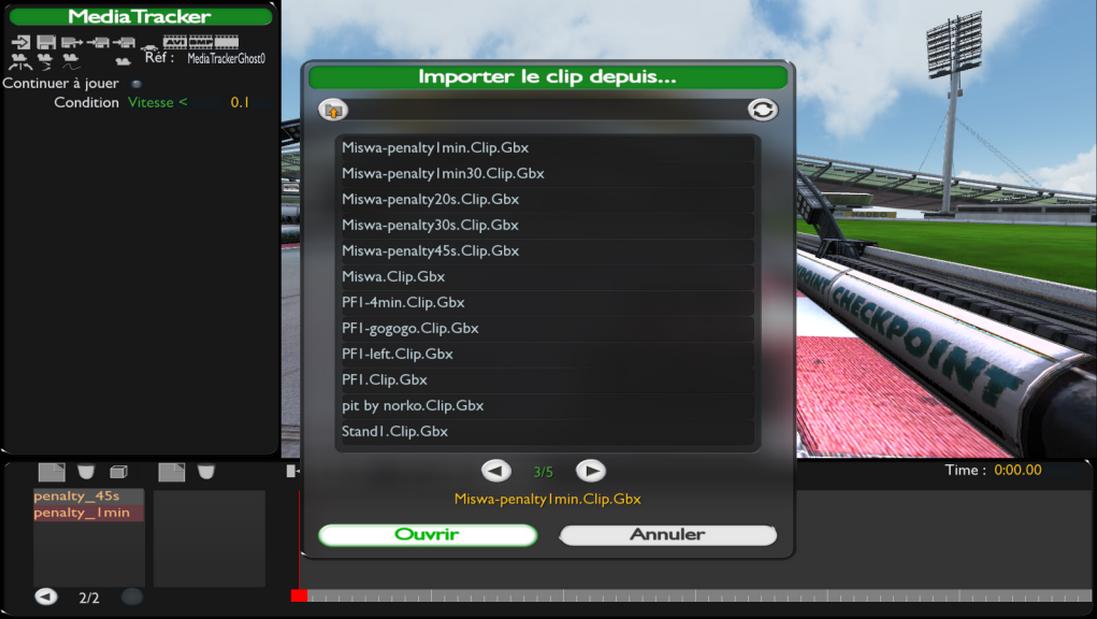
TM² Screen (English language setting) - Select the clip import button in the left bottom side of the screen
TM² Screen (English language setting) - Click on the Rename Clip button (red) to change the name CPx Penalty xxxx. Click on the condition (green) to select the condition Speed <. Click on the condition value (blue) to set the speed to 0.1
|
TM² Screen (English language setting) - Select the Penalty 1min Clip in the import selection screen and click on OPEN
|
Last step is to check if the track works! You can for example try to refuel, try to respawn and see if the penalty works and that you have the time to go to the pits.
Tip
When using the MT
- If you need to change the clip don't forget to remove the initial imported clip! Or better; just delete the whole clip and create a new one, it's quicker.
- Be sure that the condition value set in the Start 4min clip is correct when deleting or adding clips (that come before this clip in the clip editor)
Standard camera controls:
- Arrow keys and PgUp/PgDn move the camera
- Right mouse button rotates the camera
- Ctrl + right mouse button rolls the camera.
- Mouse wheel zooms in and out.
- Right mouse button moves text
- Alt + right mouse button resizes text
- Alt + middle mouse button rotates text
- With a keyframe selected, hold Ctrl and click on a second keyframe to copy everything from the second keyframe. This has saved me so much time positioning cameras and text.
- With a keyframe selected, hold Shift and click on a second keyframe to move the first keyframe to the position of the second one. Very useful for making sure things start and end at the same time.
- Ctrl+D duplicates the selected block.
- Tab toggles the mediatracker GUI.
- - and + on the numpad change the speed of the free camera. Useful for accurately placing cameras.
- Home goes to the beginning of the clip, and End goes to the end of the clip.
- Backspace goes to the beginning of the clip and starts playing.
F1 Lorino
Last edited by Statler on 04.02.2016
Last edited by Statler on 04.02.2016
